Basement Information – Wood Foundations
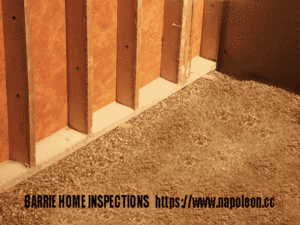
Basement Information – Wood Foundations – This standard applies to all PWFs and gives specific details for buildings up to 2 storeys in building height with building areas less than 600m2.
The standard is based on specific design assumptions regarding installation procedures, soil type, clear spans for floors and roofs, dead and live loads, modification factors, deflections and backfill height. If any of the design  conditions are different from or more severe than the assumptions, the PWF must be designed by a professional engineer or architect and installed in conformance with the standard.
In addition to the requirement for professional design described above, some local authorities in Saskatchewan require professional design for all foundations or professional designers’ certificates for PWFs.
These are only highlights of standard. Copy of complete standard is available from Canadian Standards Association ( CAN/CSA-S406 ) 178 Rexdale Boulevard, Rexdale (Toronto) Ontario M9W 1R3
Support for Exterior Steps, Landings and Slabs
Adequate provisions must be made to account for the effect of additional loading when a driveway or garage slab is adjacent to a PWF. This may be done by selecting the size and spacing of the wall studs to suit, or by supporting the slab on a knee wall.
Exterior steps and landings may be supported on a PWF, but they shall not be hung so as to be cantilevered from the PWF>
Exterior Moisture Barrier
Except for knee walls or crawlspaces with trenched footings, the below-grade portion of the exterior face of a PWF enclosing habitable space must be protected by a 6 mil polyethylene moisture barrier. It must be applied to the plywood by embedment into vertical beads of sealant or into uniformly applied damp proofing. The moisture barrier must be cover the entire surface of the wall below grade including a wood footing, but cannot extend over the granular drainage layer, under a wood footing, or obstruct the drainage passages in a concrete footing.
The moisture barrier must be protected at the upper edge and at corners. At the upper edge and at corners. At the upper edge, 150 mm of the moisture barrier must be looped over a 12.5 mm thick by 300 mm deep cover plate of treated plywood. The top of the cover plate must extend at least a 75 mm above grade at any point, and be embedded in sealant or damp proofing along its entire length.
Backfilling and Site Grading
PWFs must not be backfilled until the basement floor and the floor at the top of the foundation walls are fully installed, including subfloor sheathing and all fastenings.
Backfill must be placed in uniform 600 mm lifts and should not be mechanically compacted. Backfill must be free from deleterious debris, frozen clumps an boulders. Heavy equipment must be kept a safe distance away from the foundation during backfilling.
Native soils with medium or better drainage characteristics may be used as backfill material, except in locations where native soils have a high volume change potential or where soils are susceptible to frost heave. In these locations, backfill and drainage systems must be designed by a qualified engineer. Backfill must be placed so that the final grade away from the house is minimum 1 in 12.
Basement Information – Sealing Your Basement
Four Steps – Basements can let in water, especially during heavy rains. Sealing basements from excess moisture is a great way to add an extra layer of protection against the elements. Problems resulting from water leaks and moisture damage can result in thousands of dollars worth of damage. Here are some tips that will help you seal your basement properly.
Moisture can enter your basement in a variety of different ways. When you are sealing your basement you need to keep this in mind. Water can enter your basement through cracks in the concrete, especially during heavy rains. Also, since concrete is porous, it allows a certain amount of water vapor into your basement. To combat the water vapor, people often use a dehumidifier. However, this method only masks the problem. Sealing the basement offers a much more lasting solution.
To seal the basement properly you need to first make sure that all sources of moisture inside the basement are eradicated. One common way moisture forms in the basement is through the dryer vent. Make sure the vent releases the moisture outside. The second way is through the air conditioning ducts. Make sure you insulate them properly to prevent any condensation from forming.
Divert the Rainwater
The next step to sealing basements is to make sure any rainwater that falls doesn’t go near the foundation. You may need to install a series of gutters and drains to accomplish this, depending on your situation.
After you divert the rainwater away from the foundation, the next step to sealing foundations is to make sure openings for any pipes, ducts, etc are properly sealed. Do a thorough inspection of all pipes and ducts to make sure nothing is leaking. Although you may not see any leaks, keep in mind that even the smallest bit of moisture can be damaging, so seal everything with the proper caulking material. Also make sure you caulk and seal any holes in the corners and in the ceiling.
Install A Dehumidifier
It may take a while to find every area that needs to be sealed, but the more meticulous you are the better your chances of finding everything. After you seal everything, it is a good idea to install a humidifier for extra insurance. If you have a recurrent problem with flooding, it is also a good idea to purchase and install a sump pump.
Basement Information – Installing Furring Strips
If you are a homeowner planning to finish a basement you want to install furring strips to the concrete walls so that the walls can be sheetrocked or drywalled.
Attaching furring strips to concrete walls can be easily done using 2”x2”s or 2”x3” kiln dried wood studs, liquid nail glue, and some fluted concrete nails.
Due to moisture in the basement, I prefer to use a 2”x4” pressure treated stud laid flat along the bottom of the wall. Lay the stud on its flat side up against the wall. The furring strips will sit on top of the pressure treated stud, such that there is effectively a moisture barrier between the basement floor and the kiln dried studs.
The kiln dried studs should be placed on 16 inch centers along the wall, again resting on the pressure treated 2”x4”. The kiln dried studs should run the entire height of the concrete wall.
To secure the bottom plate and studs to the wall, I first run a bead of Liquid Nails (designed to adhere to concrete and wood), along the entire length of the bottom plate/stud. If you are using 2”x3”s for the furring strips, the glue should be applied to the wider side, such that when the stud is installed, you effectively have the flat side of the stud attached to the wall.
Start with the application of glue on the pressure treated bottom plate.
Next, using a drill and a masonry bit, drill pilot holes into the bottom plate. The holes should be placed every 16 inches along the length of the plate and should penetrate the concrete walls approximately 1.5”. Then using 3” fluted nails and a 3-5 lb sledge hammer, pound the nails into the holes. Note: I prefer to drill and pound a nail, one hole at a time to eliminate alignment problems.
Once the bottom plate has been installed, repeat the process on the vertical kiln dried studs. Install one stud at a time, again on 16 inch centers. Make sure they stand straight and level.
To help hold the vertical stud in place while you are drilling holes and pounding in concrete nails, I like to toe nail the bottom of the stud into the bottom pressure treated plate first.
Once the glue has set up, the furring strips will be strongly fastened to the wall and ready for drywall.
Note: The common preferred method of insulating and finishing a basement is building a wood framed wall that is slightly separated from contact with concrete exterior wall. Metal studs are never recommend for use in framing exterior walls due to their ability to conduct the cold from the exterior wall cavity to the interior wall of finished basement.
Building new walls inside the existing concrete walls is the standard way of finishing basement walls. Such a project requires a working knowledge of construction, so many homeowners hire a professional carpenter for the job. But if you’ve got the carpentry skills and want to DIY, know that local building codes often require the use of moisture-resistant and rot-resistant building materials in the basement.
- Use treated wood if the wood will come into contact with concrete, such as the wood floor plates of framed walls, or wood furring strips that attach directly to basement walls.
- Wood treated with alkaline copper quaternary (ACQ), a chemical that reduces rot, will corrode ordinary nails and screws, so all fasteners should be ACQ-compatible.
- If installing drywall panels, use moisture- and mildew-resistant drywall.
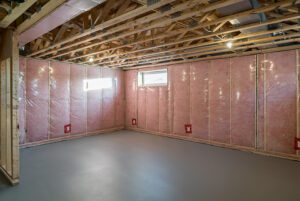
- When insulating concrete basement walls (a good idea because concrete basement walls are often cold), use rigid foam board insulation if the insulation will come into direct contact with the concrete wall. Fiberglass batt insulation can be damaged by moisture.
- Read Article on Protecting Your Basement from Flooding
Inspection Areas
Alliston
Angus
Barrie
Innisfil
Orillia
Midland
Penetanguishene
Newmarket
Wasaga Beach
Certifications


